
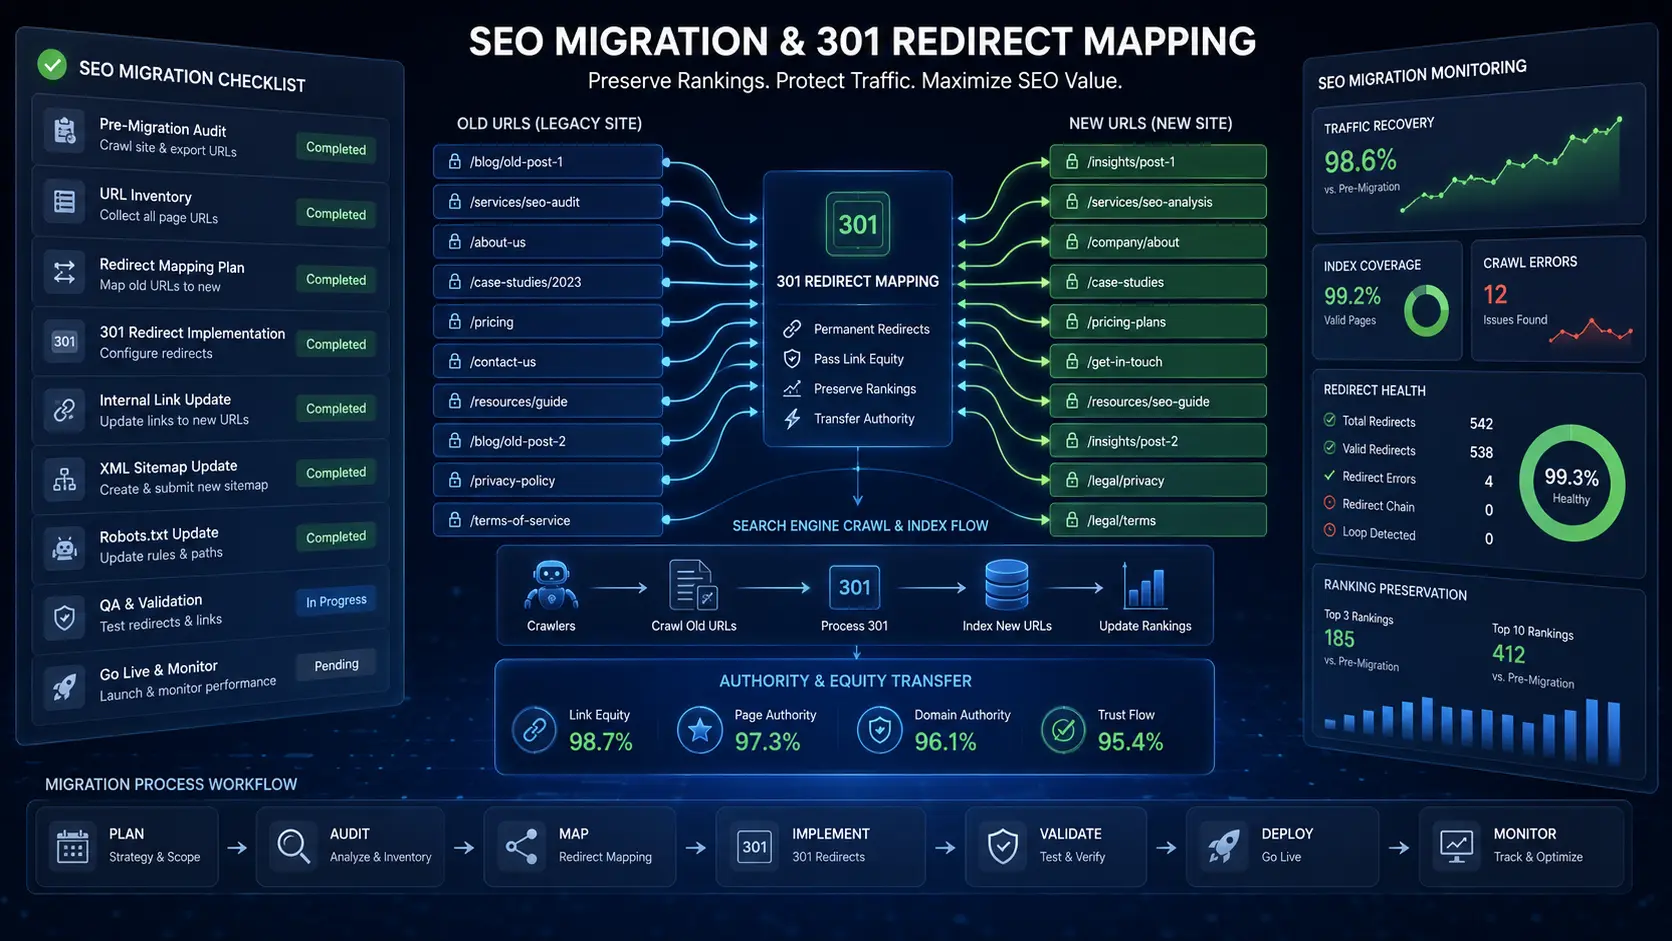
SEO Migration Checklist: 7 Proven Steps to Keep Rankings

SEO Migration Checklist: How to Preserve Rankings with 301 Redirect Mapping
Key Takeaways: Quick Summary for Technical SEOs
Link Equity Must Transfer Cleanly
A successful site migration requires mapping every old URL directly to its new location using permanent server-side 301 redirects. This is how you pass your existing ranking authority to the new pages.
Never Redirect Everything to the Homepage
Sending hundreds of old URLs to your homepage is one of the most common migration mistakes. Search engines treat this as a soft 404 error, which causes your pages to lose their rankings quickly.
Use Regex for Large-Scale URL Changes
When your entire URL folder structure changes — for example, moving from /products/ to /shop/ — you can use Regular Expressions (Regex) to handle thousands of URL redirects in one clean server rule instead of mapping each one manually.
Start Monitoring on Day One After Launch
Check your server logs and Google Search Console crawl reports every single day for the first two weeks after launch. This is when redirect errors, broken links, and indexing problems are easiest to catch and fix before they damage your rankings.
Introduction: Why Website Migrations Are High-Risk Operations
Website migrations are one of the highest-risk technical operations a growing business can undertake. Whether you are moving to a new platform like Shopify, switching to a headless architecture, or restructuring your URL format, the danger of losing organic search traffic is very real.
Many companies treat site migrations as simple design or branding projects — only to discover a 30 to 40 percent drop in organic search visibility within weeks of launching their new site. This happens not because of bad design, but because the technical SEO foundation was not properly handled during the transition.
We have worked with businesses who spent months building a beautiful new website, only to watch their leads dry up after launch because their 301 redirects were mapped incorrectly or not set up at all. The good news is that this is entirely preventable with the right SEO migration checklist and a disciplined approach to planning.
This guide gives you a clear, practical SEO migration checklist that covers every phase of the process — from the initial audit through to post-launch monitoring — so your domain authority, organic traffic, and search rankings survive the transition intact.

Short Answer: How Do You Protect Rankings During a Website Migration?
A successful SEO migration checklist comes down to one core principle — preserving the ranking authority that your existing pages have already earned. The main tool for doing this is a well-built 301 redirect map that sends every old URL to the most relevant new page on your updated site.
You must crawl your current site before making any changes, map your old URLs to new ones on a one-to-one basis wherever possible, update all internal links to point to the new URLs directly, and make sure your XML sitemap and canonical tags reflect the new site structure. When 301 redirects are missing or incorrectly mapped, search engines encounter 404 errors and treat your content as if it has disappeared — taking your rankings with it.
Why Your SEO Migration Checklist Directly Affects Business Revenue
Skipping proper migration planning is not just a technical problem. It is a business problem with direct financial consequences.
Lost Organic Traffic Means Lost Revenue
If your website currently generates leads or sales through search engines, a drop in rankings is a drop in monthly revenue. For many businesses, organic search is their primary customer acquisition channel. Losing it — even temporarily — can have serious consequences for cash flow and growth targets.
User Trust Breaks Down Fast
When visitors land on broken pages, dead links, or error messages after a migration, they leave immediately and rarely come back. A migration that is handled poorly sends a clear message to your audience that your business is unreliable — and that perception is difficult to recover from.
Fixing Problems After Launch Costs More
Resolving 404 errors, fixing broken redirect chains, and recovering lost rankings after a live launch requires significantly more engineering time and budget than setting everything up correctly in the staging environment before launch. Prevention is always cheaper than recovery.
Search Engines Need Clear Signals
Search engines do not automatically understand that your site has moved. Without explicit 301 redirect instructions, Google and other search engines treat your new URLs as entirely new pages with no ranking history. Your old pages, which had spent months or years building authority, effectively disappear from the index.
Poor Migrations Create Long-Term Technical Debt
Messy redirect chains, incorrect canonical tags, and broken internal links do not just cause short-term ranking drops. They create ongoing technical debt that slows down your site, confuses search engine crawlers, and makes future SEO work harder and more expensive.
Understanding How 301 Redirects Work in Plain English
Before going through the full SEO migration checklist, it helps to understand what a 301 redirect actually does and why it matters so much.
When someone visits a URL on your website, your server sends back a response code along with the page content. A 200 response means everything is fine — the page exists and loaded correctly. A 404 response means the page was not found. A 301 response means the page has permanently moved to a new address, and the browser or search engine bot should go to the new address instead.
The 301 status code is critical for SEO because it tells search engines to transfer the ranking authority of the old page to the new page. Without it, the new URL starts with zero authority, and all the link equity your old page had built up over time is simply lost.
A 302 redirect, by contrast, tells search engines the move is temporary. Search engines do not transfer ranking authority through a 302, so using the wrong redirect type during a permanent migration can cost you your rankings even if the redirect itself works correctly for users.
This is why your SEO migration checklist must be built around 301 redirects — not 302s, not meta refresh tags, and not JavaScript-based redirects.
The Complete SEO Migration Checklist: 7 Proven Steps
Step 1 — Crawl Your Entire Current Site Before Touching Anything
Before your team makes a single change to your site structure, you need a complete picture of what you currently have. Use a tool like Screaming Frog SEO Spider to crawl your entire live site and export every active URL, including all pages, blog posts, product pages, category pages, image files, and document attachments.
At the same time, pull your top-performing pages from Google Search Console and Google Analytics. You want to know which pages are currently driving the most organic traffic and which pages have the most backlinks pointing to them. These are your highest-priority pages—the ones that absolutely must have correct 301 redirects in place before your new site goes live.
Store everything in a centralized spreadsheet. This crawl export becomes the foundation of your entire SEO migration checklist.
Step 2 — Build Your 301 Redirect Map
With your full URL inventory in hand, your next step is to build the redirect map. This is a spreadsheet with two columns — the old URL in one column and the new destination URL in the other.
The goal is to match every old URL to the most relevant new page on your updated site. This should be a genuine one-to-one match wherever possible. Do not redirect old product pages to your homepage. Do not redirect old blog posts to your blog index. Find the closest equivalent new page and map directly to it.
If a page no longer exists on the new site and there is genuinely no close equivalent, then redirect it to the most relevant category or section. As a last resort, redirect to the homepage — but this should be a rare exception, not a default solution.
For sites with large URL structures where entire folder paths are changing — for example, moving from /blog/category/post-name to /resources/post-name — use Regular Expressions (Regex) to write a single server rewrite rule that handles the entire folder transformation in one go. This is far more efficient than manually mapping thousands of individual URLs and reduces the risk of missed redirects.
Step 3 — Update All Internal Links
Your 301 redirect map tells search engines where your old pages have moved. But relying on redirects for your internal links is inefficient. Every time an internal link on your new site points to an old URL that redirects to a new one, your server has to process an unnecessary redirect hop before delivering the page.
Before launching, go through every internal link on your new site and update them to point directly to the final destination URLs. This includes navigation menus, footer links, in-content links, breadcrumbs, and any links within your blog posts or product descriptions.
This step is one of the most time-consuming parts of the SEO migration checklist, but it pays off immediately in faster page load times and cleaner crawl paths for search engine bots.
Step 4 — Set Up and Validate in a Staging Environment
Never push redirect rules directly to your live production site without testing them in a staging environment first. Set up your new site on a staging server, implement all your redirect rules, and run a full crawl simulation to verify that every redirect is working correctly.
Check specifically for redirect chains — situations where URL A redirects to URL B, which then redirects to URL C. Search engines and browsers have to follow each hop in the chain, which adds latency and reduces the amount of link equity that transfers. Every redirect chain you find in staging should be fixed to redirect URL A directly to URL C.
Also verify that your canonical tags on the new site are pointing to the correct final URLs, and that your structured data markup — any JSON-LD schema blocks — is parsing correctly on the new page templates.
Step 5 — Update Your XML Sitemap and Robots.txt
Your XML sitemap tells search engines which pages you want them to crawl and index. After migration, your sitemap must contain only the new, final destination URLs — all returning a 200 status code. Remove all old URLs, redirect URLs, and any pages you do not want indexed.
Update your robots.txt file to make sure you are not accidentally blocking search engine crawlers from accessing important sections of your new site. This is a common mistake that can cause entire sections of a newly launched site to go unindexed for weeks.
Submit your updated sitemap to Google Search Console and Bing Webmaster Tools immediately after your new site goes live.
Step 6 — Launch and Monitor Server Logs Daily
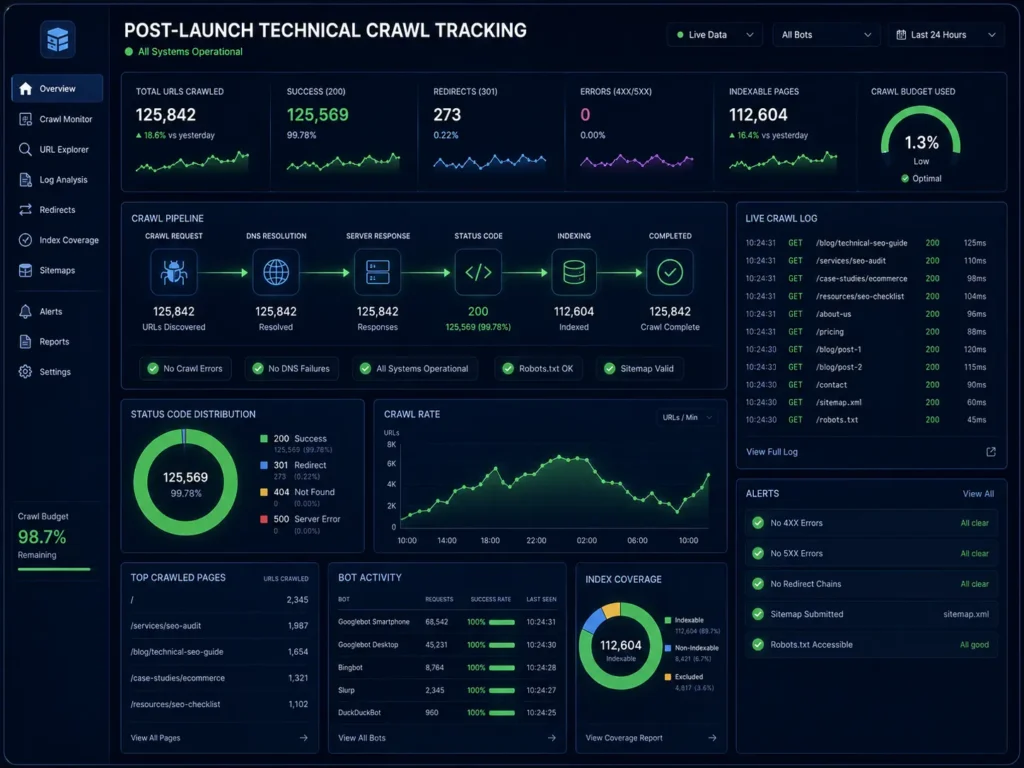
The moment your new site goes live, your active monitoring phase begins. Check your Google Search Console crawl stats and coverage reports every single day for the first two weeks. Look specifically for spikes in 404 errors, which indicate that your redirect map has gaps. Address every 404 error as quickly as possible by adding the missing redirect.
Pull your server access logs and filter for 301 and 404 responses. This gives you a real-time view of exactly which old URLs search engine bots are trying to access and whether they are being redirected correctly.
Pay attention to your Core Web Vitals scores in the days following launch. Redirect chains, unoptimized images, or new JavaScript loading patterns on the new site can affect page speed metrics, which Google uses as a ranking factor.
Step 7 — Clean Up Redirect Chains and Audit Backlinks
Within the first month after launch, do a full audit of your redirect map to identify and eliminate any remaining redirect chains. Every redirect should point directly from the old URL to the final destination in a single hop.
Also reach out to the owners of high-value external sites that link to your most important old URLs. Ask them to update their links to point directly to your new URLs. While 301 redirects do preserve most of the link equity from backlinks, having direct links to your new URLs is always better.
Use a backlink tool like Ahrefs to identify which external sites are still linking to your old URLs through redirects. Prioritize outreach to the sites with the highest domain authority first.
Technical Comparison: Redirect Types and Their SEO Impact
Use this table to choose the right redirect type for every scenario in your SEO migration checklist.
Redirect Type | When to Use It | SEO Impact
301 Permanent Redirect | Permanent URL changes and site migrations | Transfers 90 to 99 percent of link equity to the new URL
302 Temporary Redirect | Short-term A/B tests or temporary maintenance pages | Does not transfer link equity — search engines keep the old URL indexed
Meta Refresh Tag | Avoid using this for SEO purposes | Harms user experience metrics and can damage rankings
Canonical Tag | Consolidating duplicate content without redirecting | Signals preferred page to search engines but does not redirect users
JavaScript Redirect | Avoid using for primary SEO-critical redirects | Unreliable — search engines may not follow them consistently
Common SEO Migration Checklist Mistakes to Avoid
Building Redirect Chains Instead of Direct Redirects
If your old URL redirects to a middle URL, which then redirects to the final URL, you have a redirect chain. Every extra hop adds loading time and reduces the amount of ranking authority that transfers. Always map your old URLs directly to the final destination in a single step.
Launching Without an Updated XML Sitemap
Going live without submitting an updated sitemap forces search engines to discover your new URL structure on their own. This delays re-indexing and slows down your ranking recovery significantly. Always have a clean, updated sitemap ready to submit the moment your new site launches.
Changing URLs That Did Not Need to Change
One of the most common mistakes in site migrations is restructuring URLs that were already working well. If a URL is ranking, generating traffic, and has backlinks pointing to it, leave it alone unless there is a very strong reason to change it. Every unnecessary URL change is another redirect you have to manage and another potential point of failure.
Forgetting to Transfer Analytics and Tracking Tags
When you launch a new site, it is easy to focus entirely on the SEO migration checklist and forget about your analytics setup. Missing or incorrectly configured Google Tag Manager containers, GA4 tracking codes, or conversion tracking pixels means you lose the ability to measure what is happening with your traffic during and after the migration.
Ignoring Mobile Deep Links and App Indexing
If your business has a mobile app or uses app deep links for any part of your user journey, these links need to be updated as part of your migration. Missing mobile deep link updates creates broken experiences for mobile users and can affect your mobile search rankings.
H3: Skipping the Post-Launch Audit
Many teams treat migration as complete the moment the new site goes live. The post-launch monitoring phase is just as important as the pre-launch preparation. Skipping it means redirect errors, crawl issues, and indexing problems pile up undetected until they have already caused significant ranking damage.
Frequently Asked Questions About the SEO Migration Checklist
How long does it take for Google to process 301 redirects after a migration?
The time it takes Google to process 301 redirects depends on your site’s existing crawl budget and domain authority. For sites that Google crawls frequently, redirect processing can begin within a few days. For smaller sites with lower crawl frequency, it may take two to four weeks for Google to fully re-index the new URL structure. Complete ranking stabilization — where your new URLs have fully inherited the authority of the old ones — can take anywhere from four to twelve weeks depending on the size and complexity of the migration.
How do we handle 301 redirect mapping for large sites with thousands of URLs?
For large-scale site migrations with thousands of URLs, manually mapping every single redirect is not practical. The most efficient approach is to use Regular Expressions (Regex) to write pattern-based server rewrite rules that handle entire folder structures in one rule. For example, if your entire blog URL structure is changing from /blog/post-name to /articles/post-name, a single Regex rule can handle all blog post redirects at once. These rules are implemented directly in your web server configuration — either in an Nginx server block or an Apache .htaccess file.
Do we need to keep our old domain active after migrating to a new domain?
Yes, absolutely. If you are migrating to a new domain name — not just restructuring URLs on the same domain — you must keep ownership of your old domain and maintain the 301 redirect rules pointing from the old domain to the new one. Your old domain has years of backlinks pointing to it. If you let it expire or remove the redirects, all those backlinks stop passing authority to your new domain. Keep the redirects in place for at least two to three years after the migration.
Will our organic traffic drop during a migration even if we do everything correctly?
A small amount of traffic volatility during the re-indexing period is normal and expected, even with a perfectly executed SEO migration checklist. Search engines need time to crawl your new URL structure, process your 301 redirects, and update their index. During this window, you may see minor fluctuations in rankings and traffic. However, if your redirect map is thorough and your technical setup is clean, traffic should stabilize and recover fully within four to eight weeks. A poorly executed migration, by contrast, can cause traffic drops of 30 to 60 percent that take months to recover from.
Do 301 redirects slow down website page speed?
A single, direct 301 redirect adds only a few milliseconds of processing time, which has a negligible impact on page speed. The performance problems occur when redirect chains are present. Each additional hop in a chain adds latency and increases the time before the final page begins loading. This is why eliminating redirect chains is a critical step in any SEO migration checklist. Aim for a maximum of one redirect hop between any old URL and its final destination.
Do we need a new XML sitemap after a site migration?
Yes, always. Your post-migration XML sitemap must contain only your new, live URLs — all returning a 200 status code. Remove all old URLs, redirect URLs, and any pages you do not want Google to index. Submit the updated sitemap through Google Search Console and Bing Webmaster Tools on launch day. A clean sitemap accelerates the re-indexing process and helps search engines discover your new URL structure as quickly as possible.
What tools should we use to monitor our SEO migration checklist in real time?
The most important tools for post-migration monitoring are Google Search Console for crawl coverage reports and index status, Screaming Frog SEO Spider for running crawl simulations and identifying redirect chains and 404 errors, and Google Analytics or GA4 for tracking organic traffic trends. For enterprise-scale migrations, server log analysis tools like Splunk or dedicated log analyzers give you the most granular view of exactly which URLs search engine bots are crawling and how they are responding. Ahrefs or Semrush are useful for tracking keyword ranking changes in the weeks following launch.
Conclusion: Protect Your Search Rankings Through Every Transition
At MarkupMarvel, we treat every site migration as a precision engineering project. Preserving years of accumulated search authority through a platform change, URL restructuring, or domain migration requires deep technical knowledge, disciplined planning, and rigorous testing at every stage.
Our SEO migration checklist is built on the same framework we use for every client migration we manage — from small business replatforming projects to enterprise-scale migrations involving tens of thousands of URLs. We do not just set up redirects and hope for the best. We audit, map, test, launch, and monitor every migration with the same level of care we would apply to any mission-critical engineering deployment.
Your Rankings Are Worth Protecting
The organic search visibility your business has built up over months and years is one of your most valuable digital assets. Do not let a poorly planned migration erase it. With the right SEO migration checklist, the right technical team, and the right monitoring in place, your new site can launch without losing a single position that matters.
More Blog

High-Availability Cloud Infrastructure: 5 Proven Steps

Nginx Redis Caching Optimization: 6 Proven Speed Tactics

Content Optimization for AI Search: 5 Proven Steps to Rank



